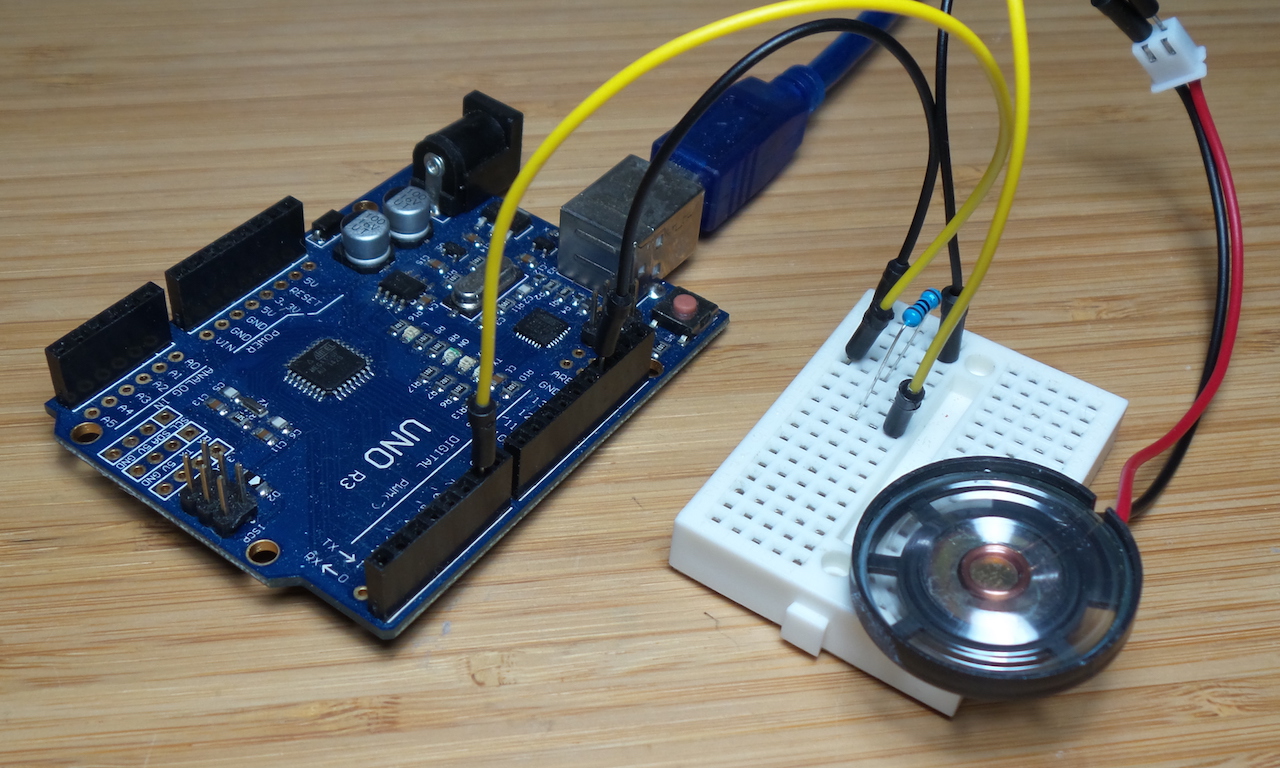
LEAP#364 Classic Nokia Ringtone
For obscure reasons, I wanted a version of the classic Nokia ringtone on an Arduino. So… I transcribed the score in Guitar Pro and tested it in a little sketch.
As always, all notes, schematics and code are in the Little Electronics & Arduino Projects repo on GitHub
Here’s a quick demo:
read more and comment..
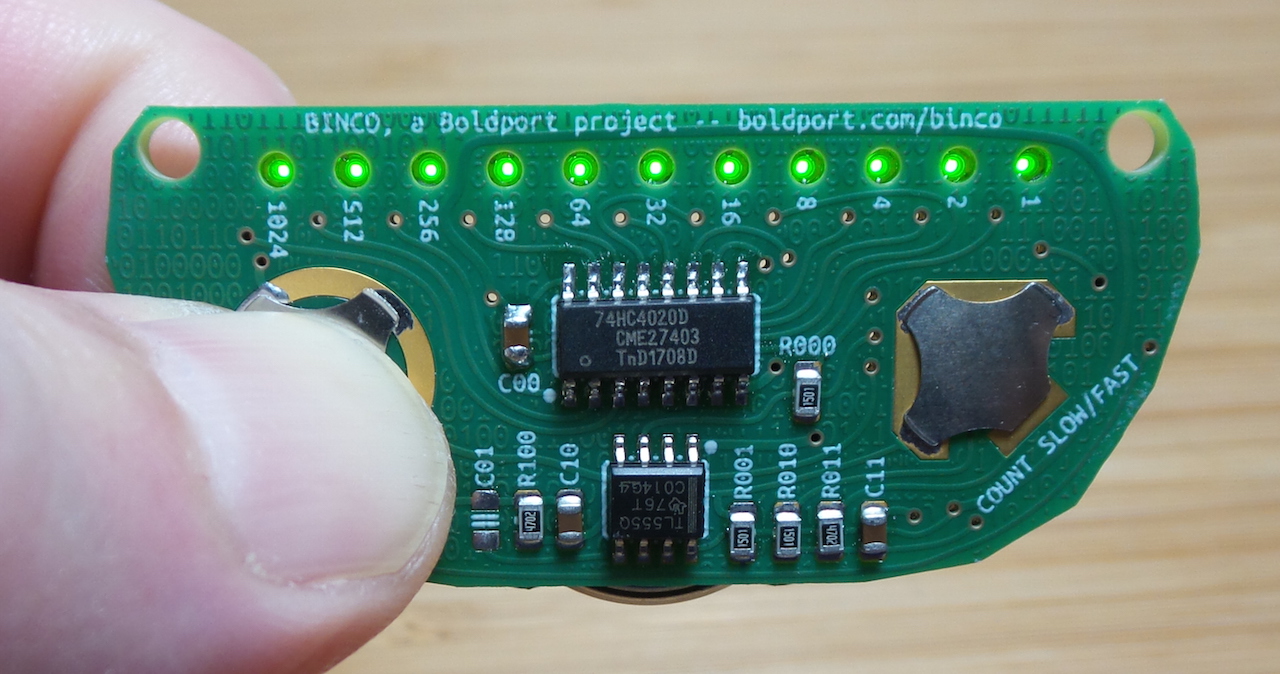
LEAP#363 BINCO fidget counter
The BINCO a binary counter that can be configured to count up or down. It uses Snaptron domes as buttons (on, slow/fast a,d rest). The heart of the counter is a 555 timer driving a 74HC4020D 14-bit Binary Counter from which 11 taps drive some nice reverse-mount LEDs.
As always, all notes, schematics and code are in the Little Electronics & Arduino Projects repo on GitHub
read more and comment..
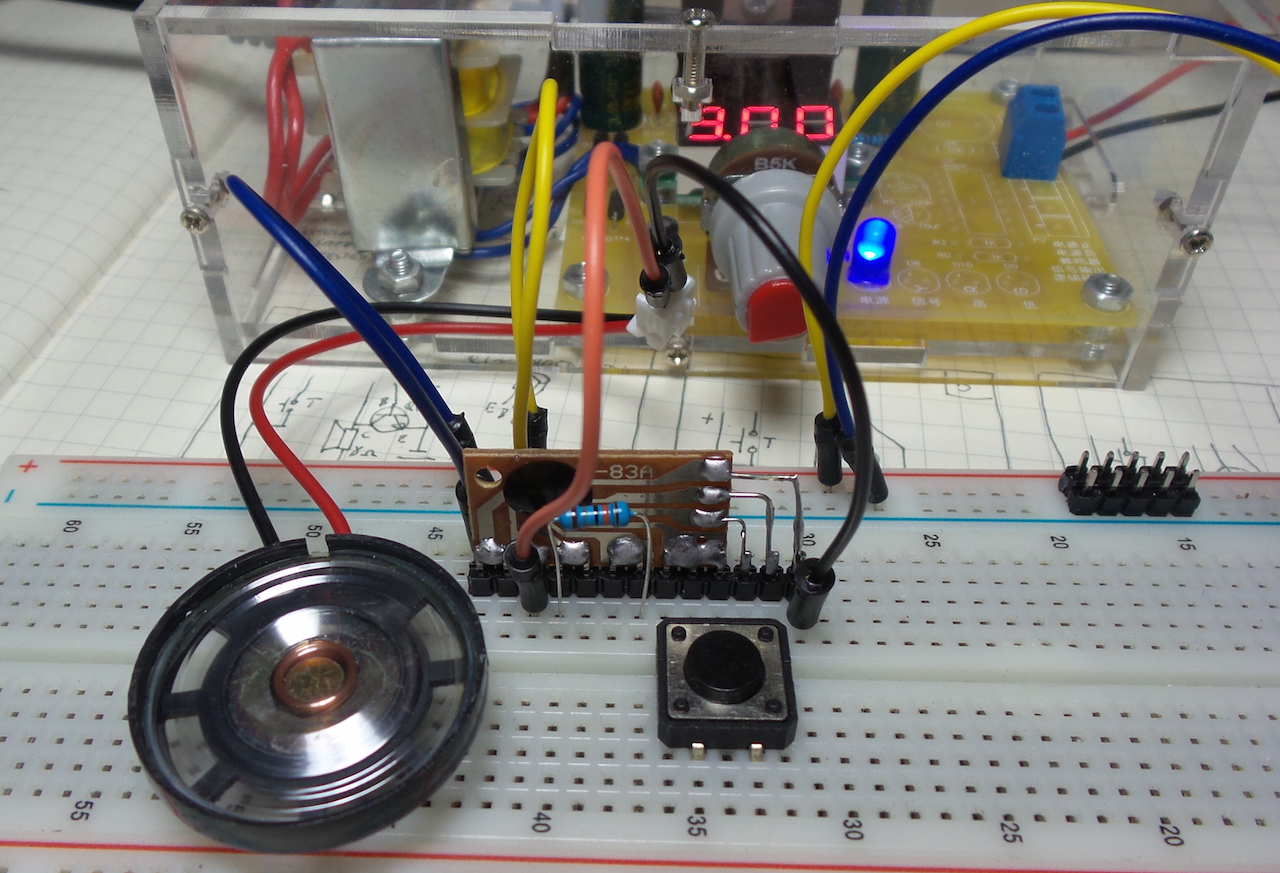
LEAP#362 H-83A 12 song music chip
The H-83A is yet another music chip, this time programmed with 12 tunes. I haven’t figured out all the songs, but they sound like classic Chinese folk tunes.
This chip requires very minimal external components (resistor, switch and power), but volume is decent in all it’s 8-bit wonder!
As always, all notes, schematics and code are in the Little Electronics & Arduino Projects repo on GitHub
read more and comment..
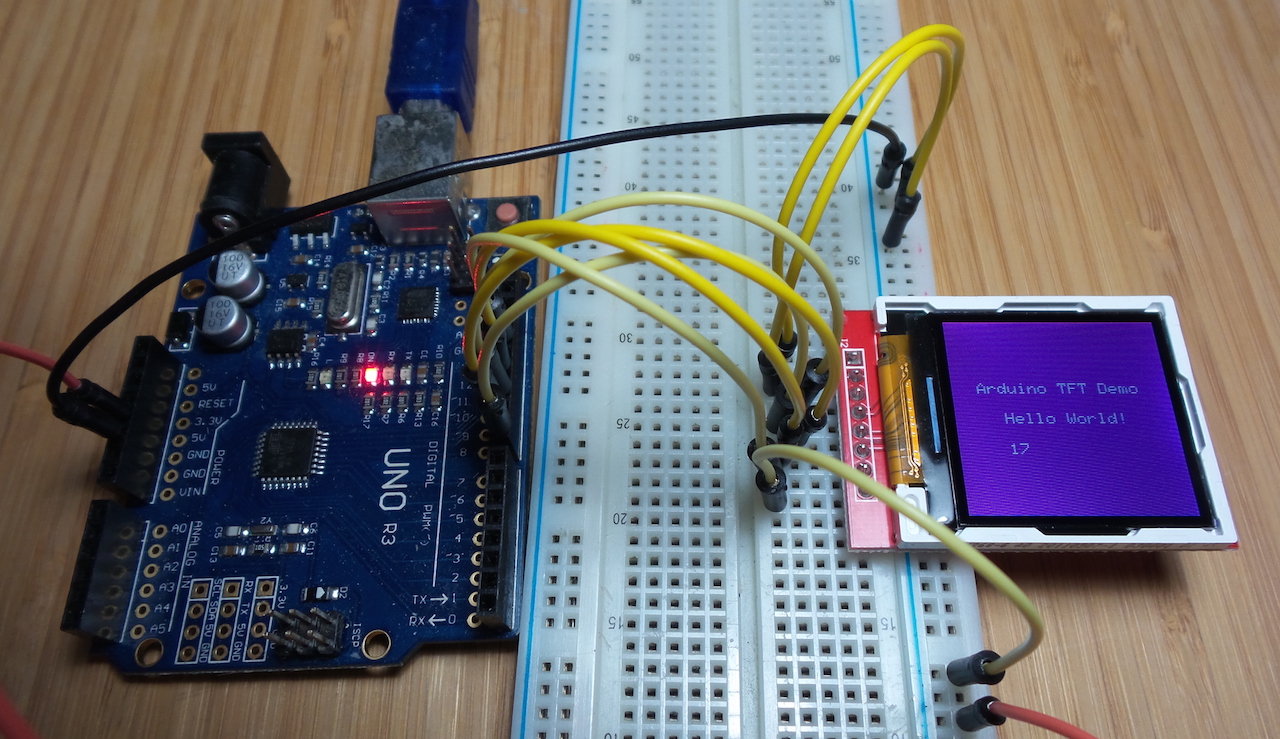
LEAP#361 128x128 TFT LCDs
I dug out a 1.44 inch 128*128 SPI Color TFT LCD Module from my parts drawer as a possible display for a project I’m working on.
First .. put it to the test and try a couple of Arduino libraries.
As always, all notes, schematics and code are in the Little Electronics & Arduino Projects repo on GitHub
read more and comment..